Physical Address
304 North Cardinal St.
Dorchester Center, MA 02124
Physical Address
304 North Cardinal St.
Dorchester Center, MA 02124
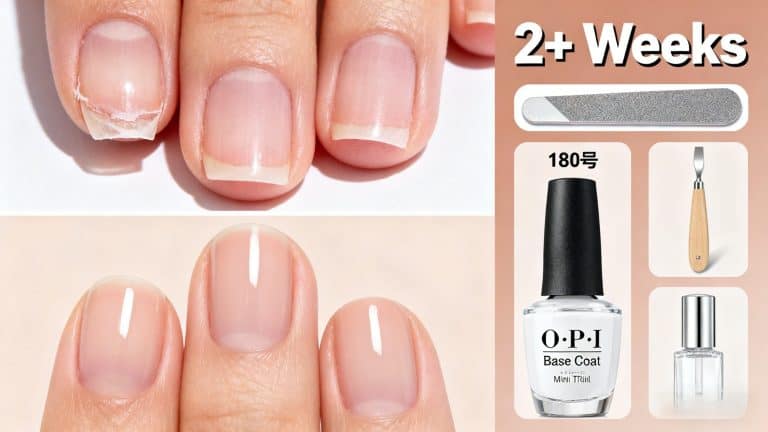
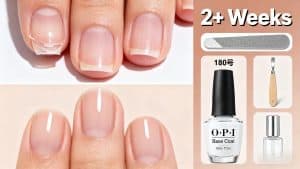
As someone who switches gel manicures every two weeks, I’ve struggled with their stubbornness firsthand. The core reason gel nail polish is so hard to remove lies in its ingredients and curing process.
Unlike regular nail polish that sits on the nail surface, gel polish contains photo-curable resins. When UV or LED light hits these resins, they change. They go from liquid to a hard, solid form. This creates a strong chemical bond with your natural nail, not just a simple physical attachment.
Worse yet, a typical gel manicure consists of three layers: base coat, color gel, and top coat. Each layer cures separately, forming a tough protective film that’s resistant to ordinary nail polish removers.
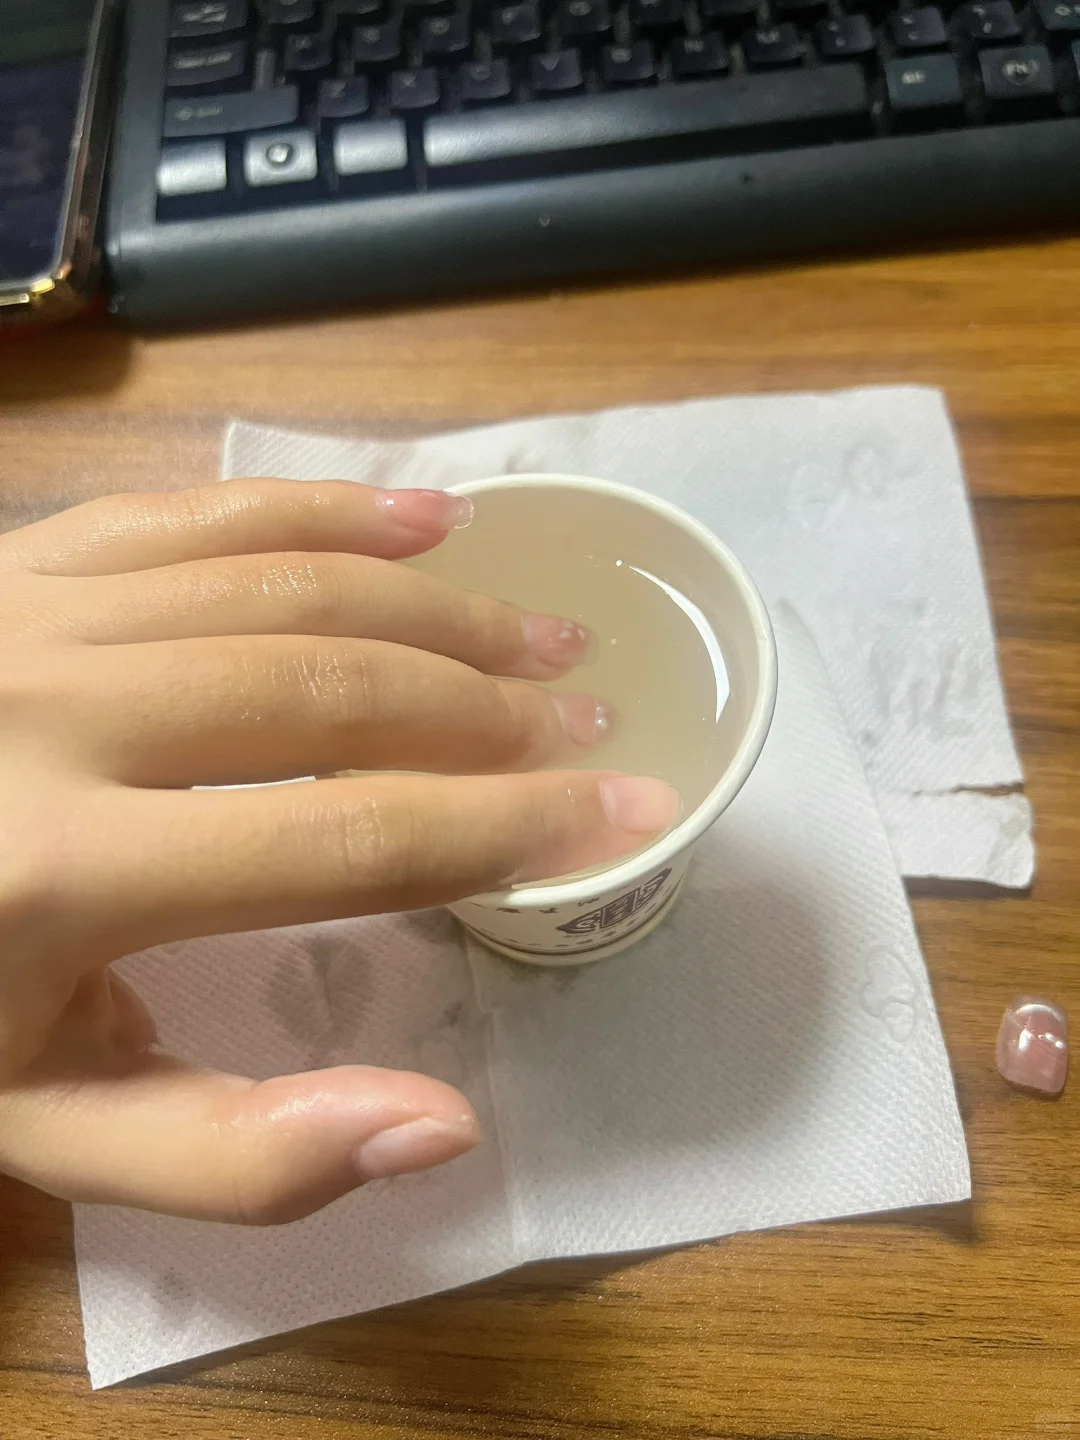
To break this down using regular methods, you usually need to sand the top layer first. Then, soak your nails in strong acetone for a long time. This process is annoying and can cause damage.
Scroll through beauty forums or TikTok, and you’ll find dozens of gel removal hacks—but most are more hassle than they’re worth. Let’s break down the most popular ones:
First, the “acetone soak”: Soak cotton balls in acetone, wrap each nail in foil, and wait 15 to 20 minutes. It sounds straightforward, but acetone is harsh. I once tried this and ended up with cracked cuticles and nails that felt like paper. It also has a strong, unpleasant odor that lingers.
Second, pre-soaked gel removal wraps. They say they are convenient, but a pack costs about $8. The chemical solvents inside made my sensitive skin red and irritated.
Some people even use nail drills. But if you’re not a professional, it’s easy to overdo it. I once sanded down to my natural nail bed, and it took months to grow back smoothly.
Even “peel-off” gel polishes are not a good solution. They still need a special base coat. This base coat requires pulling to remove, which can weaken your nails over time. Simply put, these methods are either time-consuming, expensive, or harmful to your nail health.
After testing countless methods, I finally found the holy grail—no chemicals, no cost, and it takes less than 5 minutes. The secret ingredients? Cooking oil (olive, coconut, or even vegetable oil) and warm water.
The science is clear: oil’s fatty acids break down the gel’s sticky bond. Warm water softens the polish, making it easy to lift off instead of scraping it. Here’s the step-by-step process that works for my sensitive nails and my friends I’ve helped:
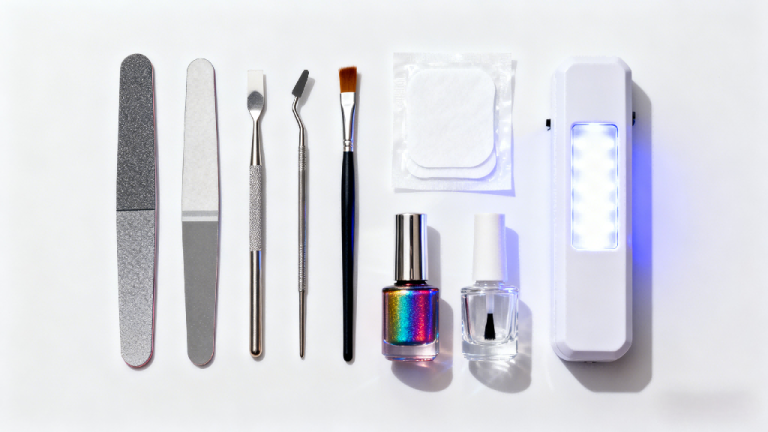
First, gently buff the top glossy layer of your gel polish with the 240-grit buffer. Swipe 3-4 times per nail; you just need to break the “seal” so the oil can penetrate. Don’t press too hard—you shouldn’t feel any discomfort.
Next, slather oil on every nail, making sure to cover the entire surface and the edges around your cuticles. Let it sit for 30 seconds—I timed this once, and the gel edges already started lifting slightly. Then pour the oil into the warm water and stir gently to create an oil-infused soak.
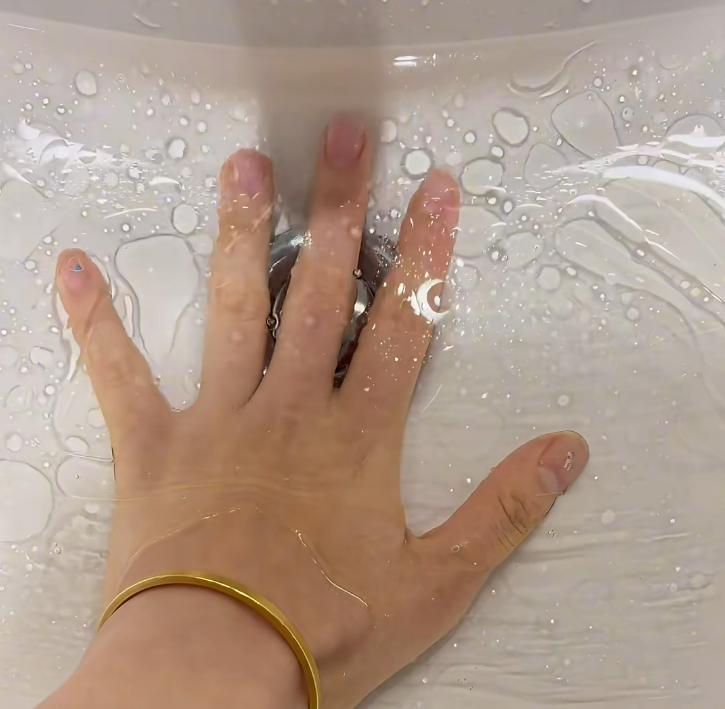
Dip your hands into the oil-and-water mixture, ensuring all nails are fully submerged. Set a kitchen timer for 5 minutes—any longer and your skin might get pruney (unnecessary, not harmful). For the most stubborn types, like dark or glitter gel, I recommend a 6-minute soak. This is my method for my favorite navy blue or holographic sets.
The warm water softens the gel, while the oil continues to dissolve its bond with your nail. I usually use this time to check my messages—no tedious waiting around.
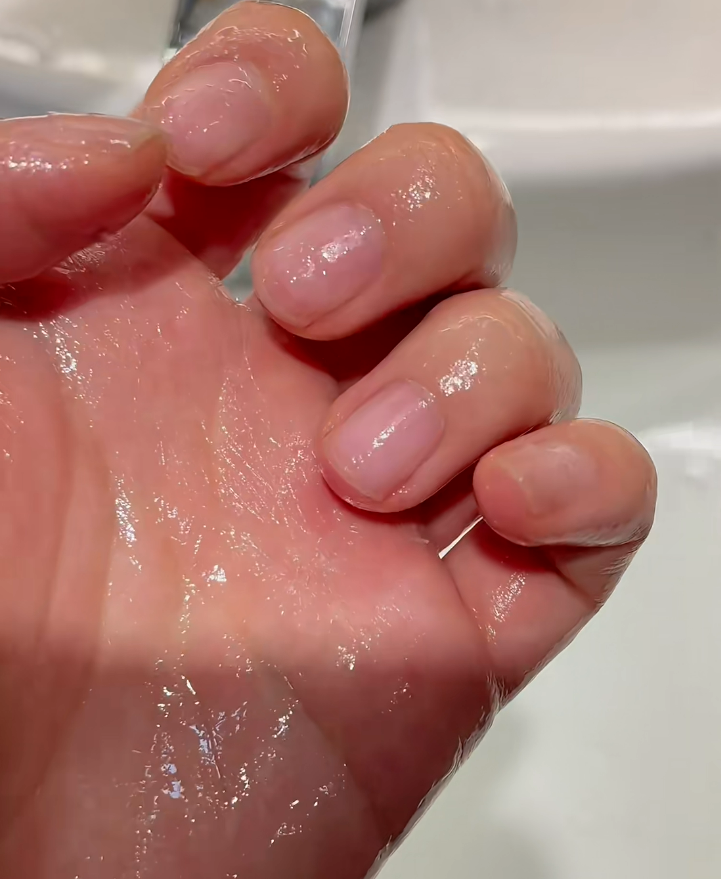
Take your hands out and pat them dry with the towel. You’ll already see the gel lifting at the edges. Grab your cuticle pusher (plastic is safer!) and gently push the gel from the base of your nail to the tip. It should come off in one large, intact sheet—when I first tried this, I was shocked at how clean it was.
If there’s any tiny residue (common with glitter), dab a drop of oil on the spot, rub gently, and it’ll wipe away. Never pick or scrape hard—if the gel is stuck, soak for another 30 seconds. I learned this the hard way when I picked a stubborn spot and peeled off a layer of my natural nail.
When exposed to UV or LED light, these resins transform, shifting from a liquid state to a solid, hardened form.The best part? I’ve saved over $100 in salon removal fees this year alone.
This method isn’t just “cheap”—it’s better for your nails. I used to leave the salon with peeling, sensitive nails; now, after removal, my natural nails are smooth and strong. Twelve of my friends have switched to this hack, and none have gone back to acetone.
Next time your gel manicure starts chipping, reach for that bottle of olive oil and a bowl of warm water. Easy removal, zero cost, happy nails—what more could you ask for?